Intellij IDEA + Android SDK + Genymotion Emulator打造最佳Android(2)
插件下载地址:https://cloud.genymotion.com/page/launchpad/download/ (同样需要登录)或者尝试下载:http://plugins.genymotion.com/plugins/idea/1.0.3/genymotion-idea-plugin-20140326.jar
The installation of the plugin can be done by launching IDEA and going to “File / Settings” menu, then go to “IDE Settings” section, then “Plugins”.
Click on “Browse repositories” button and search “Genymotion” entry. Follow the steps indicated by IDEA.
这是从官网上抄袭的安装指南,大家不难看明白,所以至此我们的环境已经打造完毕。
测试环境
打开Intellij,并确保Genymotion的插件安装正确,下图的上方的红色剪头即为Genymotion的插件按钮,通过点击这个按钮,我们需要创建Android virtual device,我已经创建了多个,在此我选择lorin_Nexus开头的,并启动它。

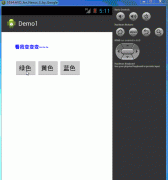
下图是已经启动的Genymotion模拟器,是不是真的很快很酷!?

接着我们可以创建一个Android工程,并将该工程置于Android开发状态,最后一张图的红色框住的部分,默认为测试状态,然后点击红色框框的运行按钮,即会调出下方的Choose Device窗口,这就是我在强调的最重要的一项是Target Device一定要选择Show device chooser 的dialog原因。

点击红色框框后方的运行按钮,你的程序就被Target到Genymotion模拟器中啦,怎么样,速度真的很棒哦,更多关于Genymotion的功能将会在接下来的开发过程中一一介绍。


